Seedance 2.0: A Complete Hands-On Guide to Becoming a Director with AI Video
Tutorials · June 10, 2026 · 7 min read
Seedance 2.0 dropped a moments ago and it's already everywhere.
Movie-level chase sequences. Cinematic camera moves that look like they belong in a big-budget commercial. Period dramas, time-travel stories, martial arts action films, shots so clean and detailed that the "is this AI or real footage?" question is genuinely hard to answer.
That's not hype. That's just what the outputs look like.
We've been putting it through its paces at Areze AI Creative Studio, and the results hold up. But the reason it blew up so fast isn't just the visual quality, it's what the model actually gives you control over.
AI video used to be a generation problem. You'd describe something, hope for the best, and fix it in post. Seedance 2.0 treats it as a direction problem. Mix images, video, audio, and text in the same prompt, and actually get what you meant.

This time, things are different.
Seedance 2.0 isn't just a text-to-video tool anymore. It takes images, video clips, audio, and text simultaneously, and instead of just processing them, it understands what you're trying to do with each one. Then it puts it all together.
That might sound abstract on paper. The rest of this guide makes it concrete, every feature, every workflow, broken down into exactly how creators are actually using it.
What Can Seedance 2.0 Actually Do?
The core upgrade is multimodality, and it's a bigger deal than it sounds.
Earlier AI video models gave you two input options: write a text prompt, or upload a single reference image. That was it. Anything else, camera movement, facial expressions, music pacing, had to be crammed into text and hoped for the best.
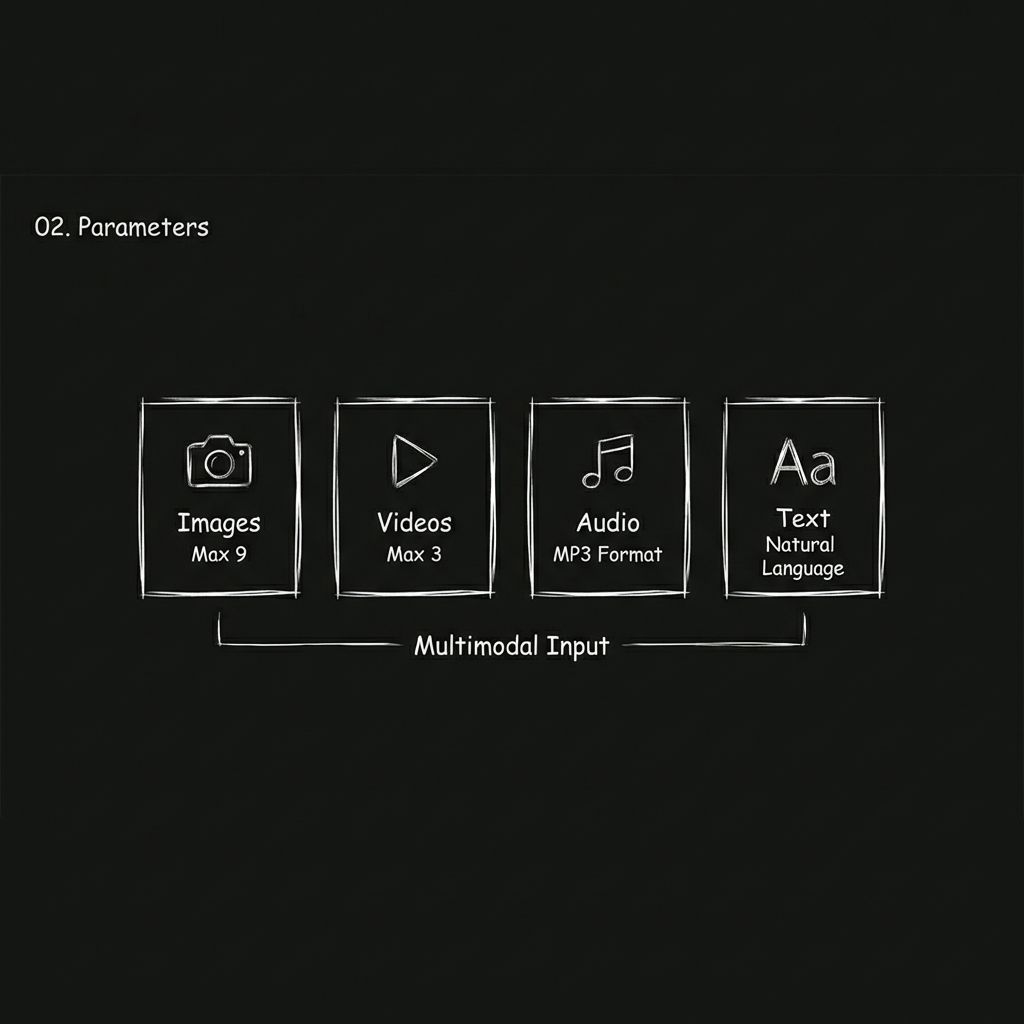
Seedance 2.0 opens this up to four input types, all of which can be combined freely:
Images
Upload up to 9 images to define character appearance, scene style, clothing, product visuals, or storyboard frames.
Video
Upload up to 3 clips (15 seconds total). The model reads camera movement, motion rhythm, and transition styles from your footage, essentially learning from a visual sample rather than a written description.
Audio
Upload up to 3 MP3 files (15 seconds total) to set background music, sound effect style, or reference a narration tone from another video.
Text
Standard natural language, describe the visuals, actions, and pacing you want. English and Chinese both supported.
Total upload cap across all four types: 12 files. Generated videos run anywhere from 4 to 15 seconds, with built-in sound effects and background music included.
The way to think about it:
Images define the look
Video defines the movement
Audio defines the rhythm
Text defines the story
A note from Areze: More reference files don't automatically mean better output. Pick the assets that have the biggest impact on your visuals or pacing, and be selective with your upload slots.
How to Use Seedance 2.0: Step by Step
Step 1: Choose Your Entry Point
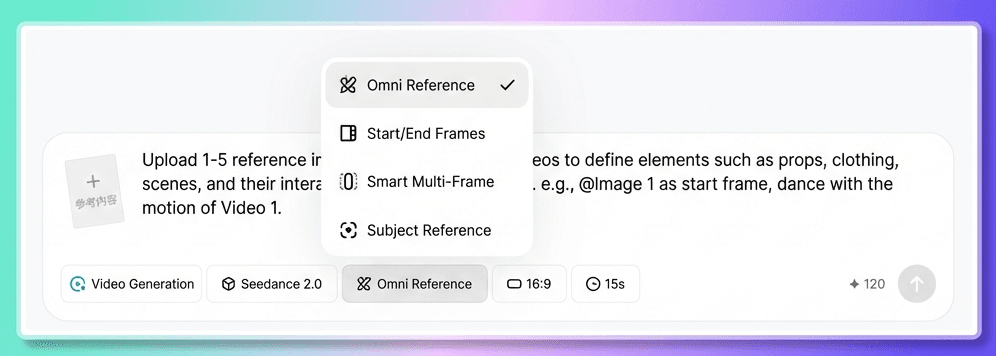
Seedance 2.0 is available directly inside Areze AI Creative Studio , no need to navigate between platforms. When you open the tool, you'll see two modes:
First and Last Frame: Use this when you're working with a single image plus a text prompt. Simple, fast, straightforward.
All-in-One Reference: Use this when your project involves multiple images, video clips, audio, or any combination of the four input types.
The decision rule is simple: one image plus text → First and Last Frame. Anything more complex → All-in-One Reference.
In most cases, All-in-One Reference is the better starting point. It supports every input type and is where Seedance 2.0's newer capabilities actually come into play.
Step 2: Upload Your Assets
Click the upload button inside Areze and drag in your files, images, video, and audio all work the same way. Once uploaded, everything shows up in the input area where you can hover to preview before committing.
One thing worth doing before you upload: think about what actually matters for the output. You've got 12 file slots total, don't fill them for the sake of it. The assets that define your visual style and pacing are the ones worth spending slots on.
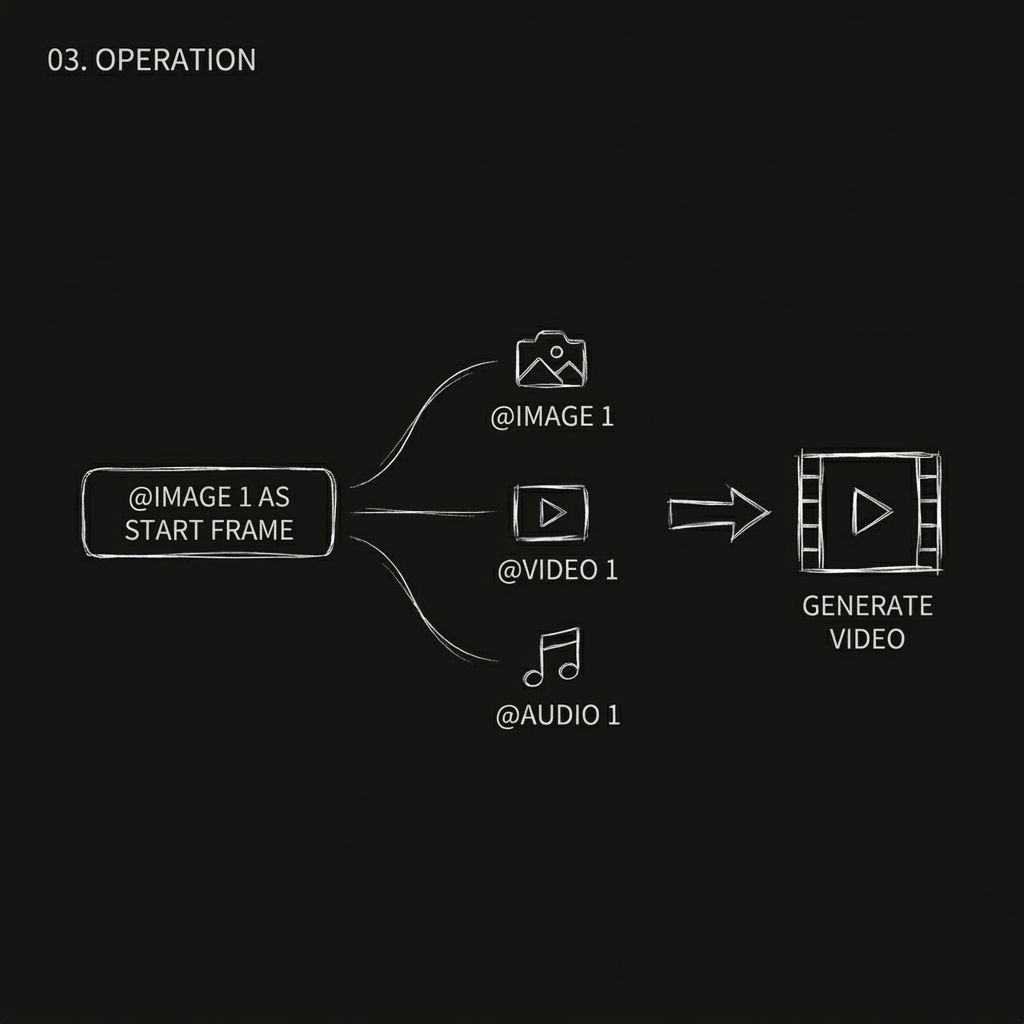
Step 3: Tell the Model What Each Asset Is For (The Step Most People Skip)
This is the most important part of the whole process, and the one beginners most commonly skip.
Uploading your assets isn't enough. You need to explicitly assign a role to each one inside your prompt using @asset name. The model doesn't make assumptions. If you don't tell it what an asset is for, it may use it wrong or ignore it entirely.
It looks like this:
@Image 1 as the first frame@Video 1 as camera reference@Audio 1 for background music
How to trigger "@"
Method 1
Type @ directly in the prompt box and a list of your uploaded assets will appear. Click the one you want to reference and it drops straight into your prompt.
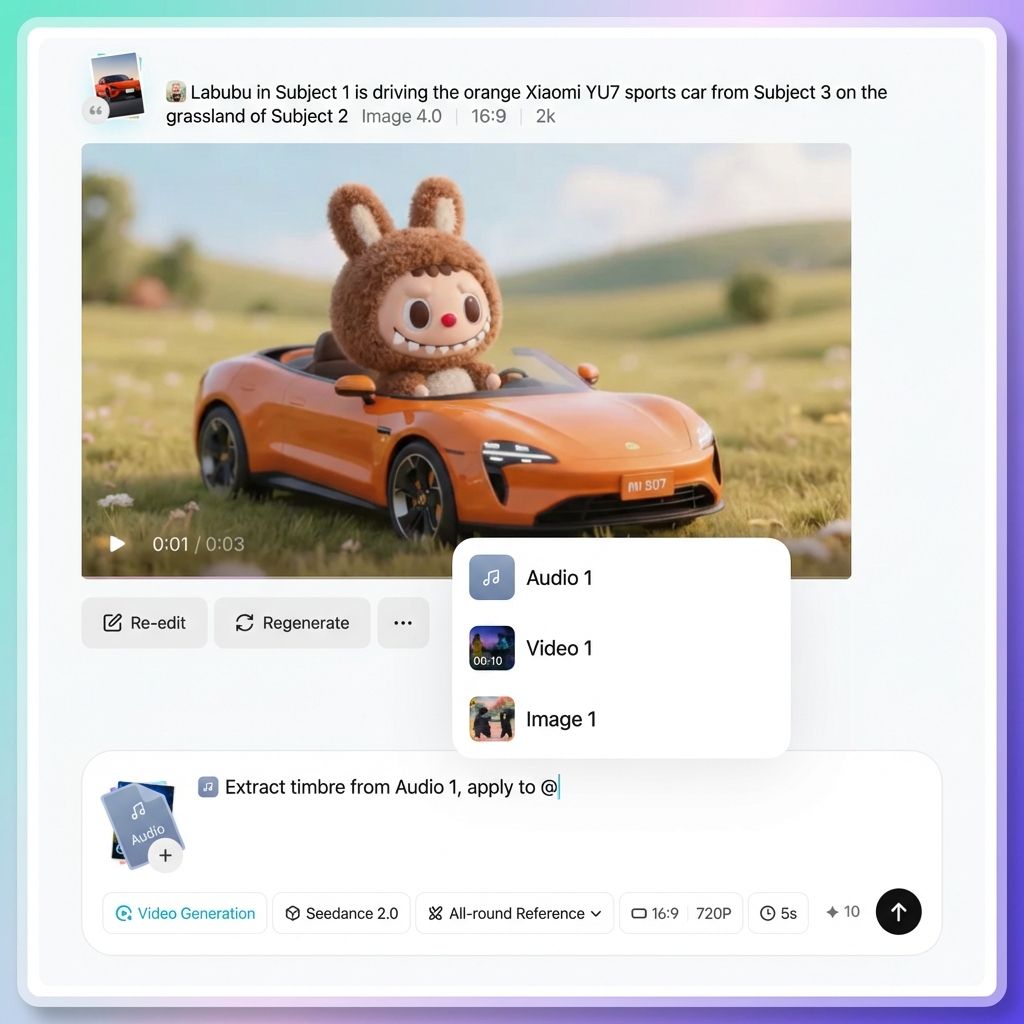
Method 2
Alternatively, hit the @ button in the parameter toolbar next to the input box, same result, different path.
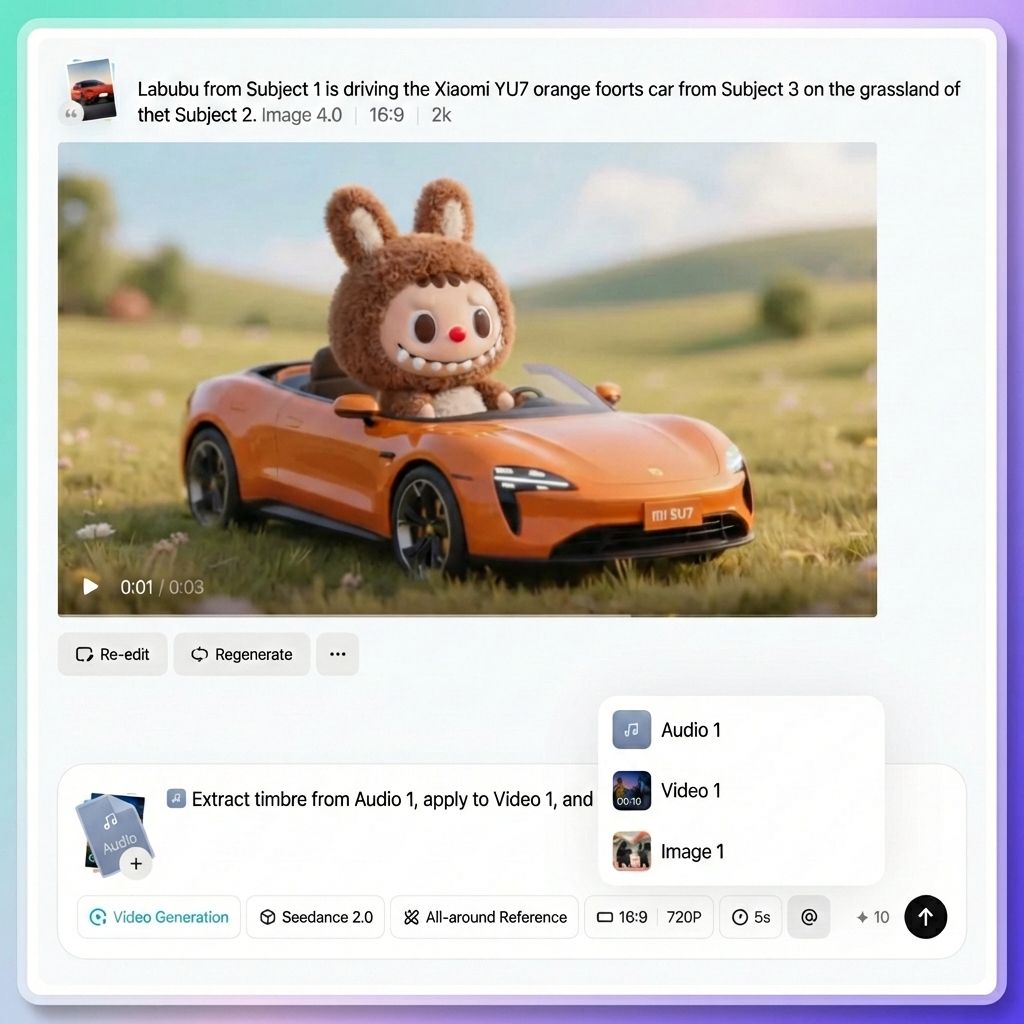
Examples of correct “@” usage
First frame + references:
@Image 1 as the first frame, reference the camera language of @Video 1, and use @Audio 1 for background musicCharacter roles:
The female character in @Image 1 as the main character, and the male character in @Image 2 as a supporting roleCamera movement:
Fully reference all camera movements and transitions from @Video 1Scene layout:
Use @Image 3 as the reference for the left scene, and @Image 4 as the reference for the right sceneAction reference:
The character in @Image 1 should reference the dance movements from @Video 1Voice tone:
The narration voice should reference the voice tone from @Video 1
Common Pitfall to Watch Out For
One thing worth double-checking before you generate: make sure every @ reference points to the right file. Assigning the wrong asset to the wrong role, an image tagged as a video, or Character A's face mapped to Character B, is one of the fastest ways to get a chaotic output.
Hover over any referenced asset in the prompt to preview it and confirm everything is linked correctly before you hit generate.
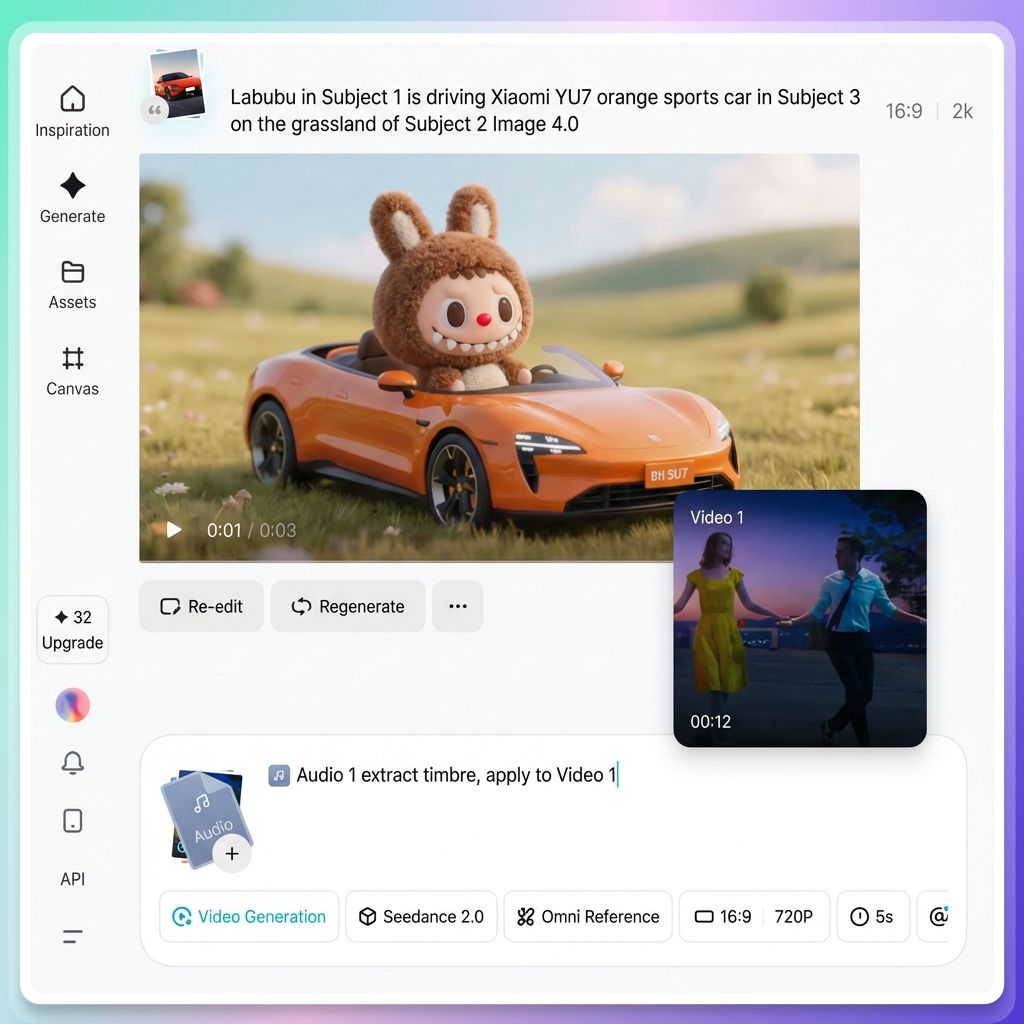
Step 4. Write a Clear and Effective Prompt
Once your assets are assigned, the rest is just describing what you want in plain language. Sounds simple, but how you structure that description makes a real difference in what you get back.
Here are four practical tips:
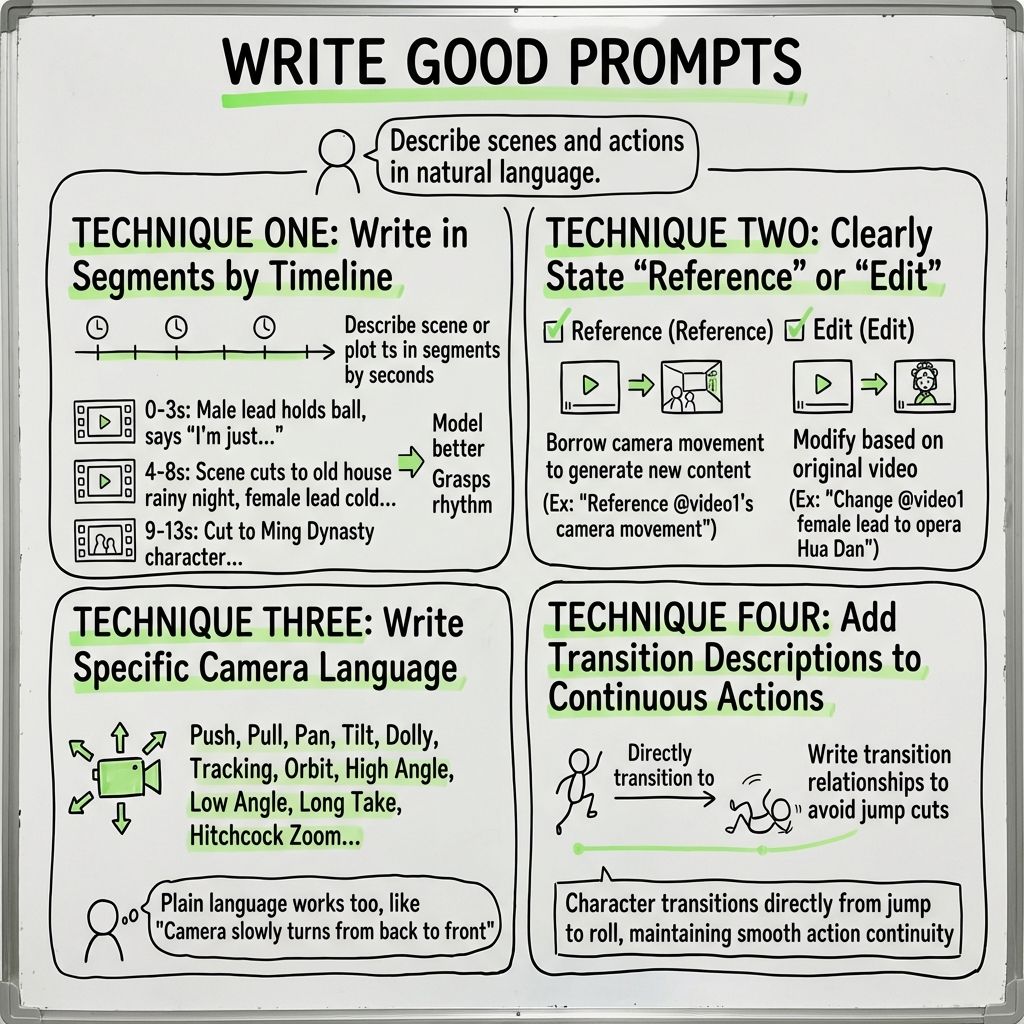
Tip 1. Write in a timeline structure
If your video has multiple scenes or narrative shifts, describe them in order, segment by segment, based on time.
For example:
0–3 seconds
The male lead raises a basketball in his hand, looks up toward the camera, and says, “I just wanted a drink. Am I really about to time travel?”4–8 seconds
The camera suddenly shakes violently. The scene cuts to a rainy night in an ancient residence. A female lead in a traditional costume looks coldly toward the camera.9–13 seconds
The camera cuts to a character dressed in Ming Dynasty clothing…
Writing this way helps the model understand the pacing and content of each segment more accurately.
Tip 2. Be explicit about “reference” versus “edit”
These aren't the same thing and the model treats them differently.
"Reference the camera movement of @Video 1" means use its motion style to generate something new.
"Replace the female character in @Video 1 with a traditional opera performer" means modify the original footage directly.
Pick the wrong framing and you'll get the wrong output.
Tip 3. Be specific with camera language
The model understands professional cinematography terms, push, pull, pan, track, dolly, orbit, top-down, low-angle, Hitchcock zoom, fisheye. Use them if you know them.
If you don't, plain descriptions work just as well. "The camera slowly moves from behind the character to the front" gets the job done. Don't hold back either way, more specificity here almost always improves the result.
Tip 4. Add transitions for continuous actions
If a character moves through a sequence of actions, spell out how they connect. "The character transitions directly from a jump into a roll, keeping the motion continuous and fluid" gives the model what it needs to avoid unnatural cuts between movements.
Step 5. Select the Duration and Generate
Choose the video length you need, anywhere between 4 and 15 seconds.
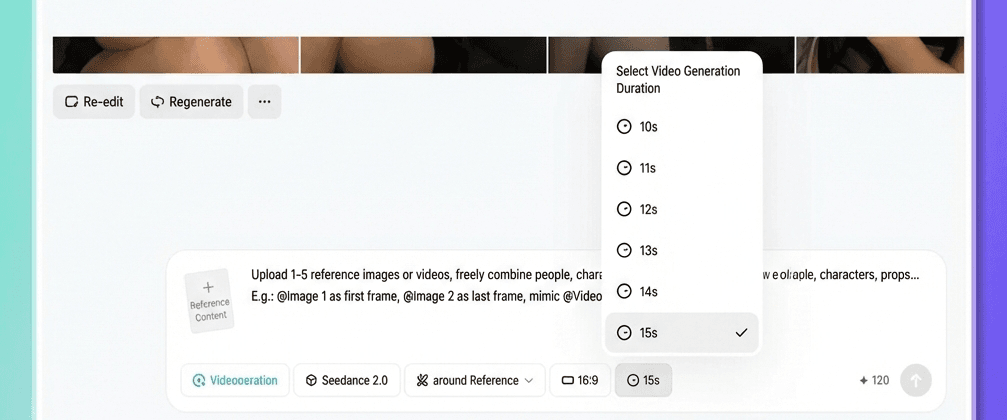
One thing worth knowing if you're extending an existing clip: the duration you select here applies only to the newly generated portion, not the total video length. Adding 5 seconds to the end of a clip? Select 5 seconds.
Hit Generate inside Areze AI Creative Studio and let it run. If the first result isn't quite right, generate again, AI outputs have a degree of randomness built in, so the same inputs can produce slightly different results each time. Run it a few times and pick the version that works best.